Warning, there may or may not be a recipe in this post. Begin rant:
People don't bake in America. I mean, there are plenty of people that bake at home like me and people that might read this blog okay. But as far as real baking in bakeries go? These institutions are few and far between.
I would absolutely adore working in a real bakery. Maybe it's this area, maybe it's because I haven't searched hard enough but these aren't easy to find. By real bakery I mean bakeries that make their own pie crust for their own pies, make their own filling for those pies. Icings and buttercreams do not come shipped in buckets and cakes do not come in frozen. And for me, maybe it's not just that these things taste better when made from scratch, but the whole point of baking is creating these things in the first place. Taking the time to measure out the ingredients, using the method to put everything together to get a final result. Yes baking is about eating and enjoying, but for me baking is also about this process.
I understand if people at home buy cake mixes and frosting in a can, that's fine. We're all busy, stress is high, and if you want a cake, you want a cake. But from a bakery I would expect more. Perhaps I was spoiled as a child. My mother never bought anything from a bakery. When you buy something from a bakery, don't you expect more? You can't create something on your own so you trust them to do it for you, better even, right? Well if a bakery is using pie filling made with half corn syrup and half stabilizers and a few frozen strawberries, how can this be the case?
Anyway, I suppose this all stems from me being frustrated working in this industry. At least in restaurants we made every sauce, mashed our own potatoes, chopped fresh parsley. Some convenience ingredients are used still, but they are expensive and restaurants know this. Why buy sliced mushrooms when you can have the prep-cook slice them for you? That's the way things should work in a bakery. In my. Opinion.
/Rant.
Tuesday, August 19, 2008
Sunday, August 3, 2008
They say you just have to keep whipping...

So I guess I haven't mentioned it before but I'm making my brother's wedding cake. The wedding is this Saturday August 9th. So since the beginning of July I've been stocking up on making batches of frosting and freezing it, baking off cakes and freezing them, practicing on them. (Which is why nothing has been posted here.) But today as I was making batch No. 1,000 of frosting I realized I should be documenting this. If not for me to remember then for the good of the internet people out there also making a wedding cake or something like it.
So part one is buttercream. I have actually made this type of frosting before but not in such quantity so it was a bit nerve wracking. (What isn't for me though?) Anyway the first frosting I made back in May for testing was from Tish Boyle's cake book, but I decided to go with this recipe from Anna Olson (Inn On The Twenty cookbook - great stuff) instead because the quantities were easier to multiply and it was being used on a wedding cake anyway, therefore I knew it would hold up well. This recipe is very looooosely based on hers. I wanted mine sweeter so I upped the sugar a bit and added vanilla, a pinch of salt. Anyway this frosting is amazing and highly recommended. It gets way too butter-like when refrigerated but it's fantastic at room temperature. Or right out of the mixing bowl.
So for step one:
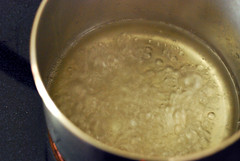
In a small saucepan measure out 1 cup of water and 1 cup of sugar. Stir a bit to dissolve the sugar in the water and start to cook it on high. You want this to eventually become very syrupy and to reach 240 degrees F.
Step two:
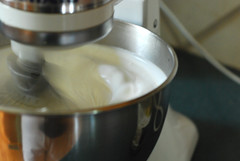
In the bowl of a stand mixer, place 8 egg whites, a pinch of salt and 1/8 teaspoon cream of tartar. Whip until soft peaks form, then add 1 cup of sugar until stiff peaks form.
Step three:
Once the syrup has reached 240 degrees F, drizzle it slowly into the egg whites while the mixer is going at medium speed. Add 1 tablespoon of vanilla extract and whip for about 10 to 15 minutes, until the mixture has cooled down.
Step four:
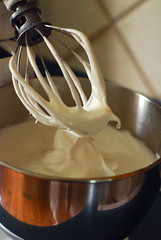
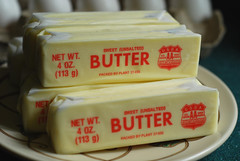
This part is pretty insane - start adding 6 sticks of room temperature butter, I like to go one stick at a time until it's incorporated. Then comes the scariest part of all... it will look as if you've ruined the frosting most likely. It will be liquidy and not like frosting at all. But you HAVE to keep whipping it. It will come together eventually. The butter will solidify once again and it will be fluffy like a buttercream.
Voila. I think this might be awesome used on cupcakes also. Spreading it is pretty easy and it doesn't have a tendency to get too many air bubbles involved.
Wednesday, June 25, 2008
What do to when you should be thinking about something else in life.
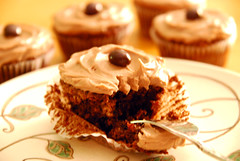
Oh that's easy. Make cupcakes. In this case I decided to search the interweb for an "oatmeal cake" and came up with a recipe something like this. Only I made them into about 18 cupcakes instead of 2 9-inch layers. You could do either and whip up a slightly more creative frosting than this one and have yourself a real winner.
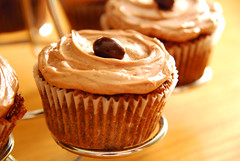
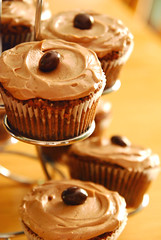
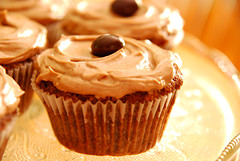
Chocolate Oatmeal Cake with Cocoa Espresso Buttercream
Cake:
1/2 cup unsalted butter, at room temperature
1 1/2 cups granulated sugar
2 large eggs
2 teaspoons vanilla extract
1 cup AP flour
1/2 teaspoon salt
1 teaspoon baking soda
1/3 cup cocoa powder (the recipe said Dutch processed was preferable. I used natural because it wasn't ;)
1 cup sour cream (originally called for buttermilk, I didn't have any.)
2 cups quick-cooking oats
1 handful of chocolate chips or chunks if you want
Preheat the oven to 350 degrees F and line a couple cupcake tins with papers.
Cream the butter and sugar together until fully incorporated. The mixture will look a little grainy, which is okay. Add the eggs one at a time, beating for about 30 seconds after each one. Combine the flour, salt, baking soda and cocoa powder and add this alternately with the sour cream, ending with the flour mixture. Stir in the oats and chocolate chunks, if desired.
Portion the batter among the cups and bake for about 20 to 25 minutes or until a toothpick inserted in the middle comes out clean. Let cool completely on a wire rack.
Buttercream:
1 cup unsalted butter, at room temperature
3 cups icing sugar
1/4 cup cocoa powder
1 teaspoon vanilla extract
Pinch of salt
1/4 cup half and half (or milk or water. I have half and half around for my coffee. Yes.)
1 tablespoon espresso powder
Bring the half and half (or milk or water) to a boil and add the espresso powder and stir. Let cool to room temperature.
Put the butter, sugar, vanilla, cocoa and salt into a food processor and blitz until creamy and combined. Then strain in the espresso-steeped liquid (so you don't get too many big granules of espresso - you could use instant espresso powder to avoid this, but I liked the look of the little specks. Like vanilla seeds only not.) and pulse again until it's nice and smooth.
Ice the cooled cupcakes and enjoy! I love chocolate covered espresso beans so they were a natural garnish for these.
Wednesday, May 28, 2008
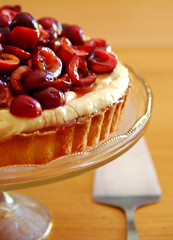
1AM Cherry Tart.
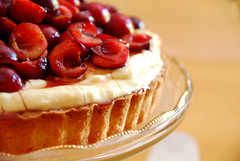
1AM. Bored, couldn't sleep. Had some leftover cherries in the refrigerator. (Just a few months left before my brother's wedding and I need to start building up those egg whites for the vats of buttercream frosting I need to make for the cake...) What is it about early morning that I love about being in the kitchen? Maybe it's the fact that no one is around, that I'm creating something while everyone else is asleep. I'm not sure, but I do know this tart came out very beautifully. I made the tart dough using my hands because I didn't want to turn on the food processor, but I'm sure that way is much easier. But perhaps a bit less satisfying.
These recipes are slightly based on the ones in Dorie Greenspan's book "Baking: From My Home to Yours" and if you want to do things the right way, you should probably follow her instructions instead. I am allergic to doing things the way they say in a cookbook, apparently.
Sweet tart dough:
1 1/2 cups AP flour
1/2 cup confectioner's sugar
Pinch of salt
1 stick plus 1 tablespoon unsalted butter, cold, cut into small pieces
1 egg yolk
Stir together the flour, sugar and salt until combined evenly. Drop the butter on top and start pinching the pieces with your fingers until you have almost combined the butter with the dry ingredients... a few pieces looking like oatmeal, a few looking like peas. That's okay. Add the egg yolk and combine with your hands until a ball of dough forms. Press this into a lightly greased 9-inch tart pan and freeze it for about 20 minutes to a half hour. Or until the oven is done preheating to 375 degrees, like I did.
Bake for about 20 to 30 minutes, or until dark golden brown around the outside and almost golden brown in the middle of the tart.
Pastry cream:
2 cups whole milk
6 large egg yolks
1/2 cup sugar
1/3 cup cornstarch
1 pinch salt
1 tablespoon vanilla bean paste
1/2 stick unsalted butter cut into pieces
Bring the milk to a boil in a medium saucepan. Meanwhile, whisk the egg yolks, sugar, cornstarch and salt together until combined well. Drizzle in about a 1/4 cup of the hot milk to temper the yolks and whisk. Then add the rest of the milk slowly, and eventually add this mixture back into the saucepan. Bring to a boil and whisk frequently for about 1 minute until very thick. Add the vanilla and the butter a few pieces at a time until it's all melted and combined.
Scrape into a bowl, press a piece of plastic wrap on top and refrigerate until cold.
For the cherries (or any other berry you might want to use):
2 cups cherries, pitted, cut in half
A few tablespoons red currant jelly (you could use apricot too probably)
Melt the jelly in the microwave or whatever, and then stir in the fruit, and toss to make sure all the fruit is about evenly glazed with the jelly. This will make the fruit nice and shiny, and will also help it to keep a bit longer if you're refrigerating a while before serving.
To assemble the tart, take the tart shell out of the pan and place it on a serving platter or plate. Spoon in the pastry cream, spreading to the edges and mounding a bit in the middle if you have a lot like I did, and then pour the fruit on top, letting it fall naturally where it wants to. I think it looks prettier than being arranged. Dig in and enjoy the fruits of summer.
Subscribe to:
Posts (Atom)